Rijtheorie HubPractise the CBR theory in 12 languagesFree on the App Store
OpenPractise the CBR theory in 12 languages
Free on the App Store
Search by code (e.g. B6) or by meaning. Most signs come with a memory hook from the app. The codes are the official codes from annex 1 of the Dutch traffic regulations (RVV 1990). Want to test yourself? Take the road sign quiz.
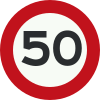
Maximum speed limit: you may not exceed the indicated speed (km/h). It applies to the road section where the sign stands: until an end sign, another speed sign or the next junction (if the limit continues, the sign is repeated). As a zone sign it applies until the end of the zone.
💡 A red ring squeezes your speed like a tight belt: the number inside is the ceiling you never break until a new sign sets you free.
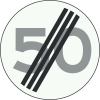
End of maximum speed limit: the previously indicated speed restriction ends; also exists as an end-of-zone variant.
💡 The grey slash cutting through the number is scissors snipping the speed leash: from here you're free of the old limit.
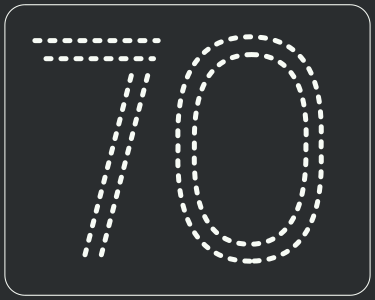
Maximum speed shown on an electronic signalling sign (matrix sign above the lane): a binding speed limit, not an advisory speed.
💡 A glowing number hanging over your lane is not a friendly tip, it is the law in lights: the matrix speaks, you obey to the exact digit.
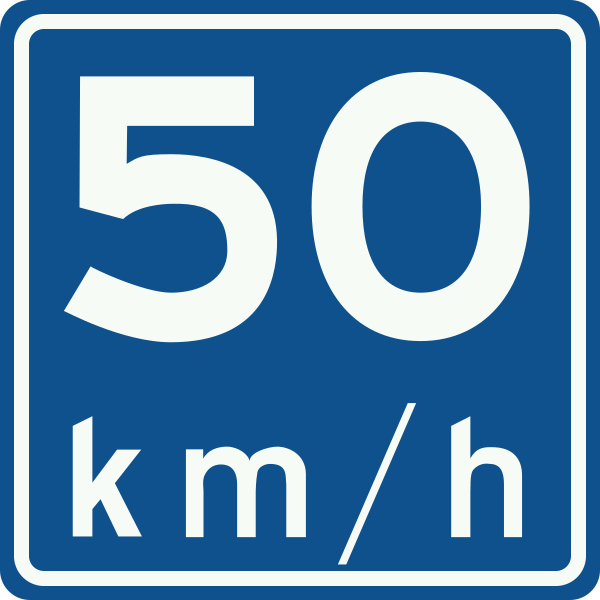
Advisory speed: recommended speed under normal conditions, e.g. before a hazard; not mandatory.
💡 The square sign with a plain white number only whispers advice, it never barks an order: 'I'd suggest this speed' - a friendly wink before the danger, not a rule.
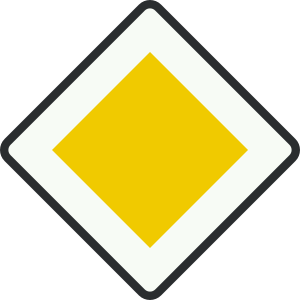
Priority road: you are on a priority road and have right of way over all crossing traffic.
💡 Picture the yellow diamond as a king's crown balanced on its point: you're the royal of the road, and every crossing car must bow and wait.
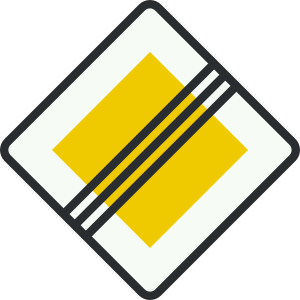
End of priority road: the priority road ends; from here normal priority rules apply again (e.g. priority to the right).
💡 The diagonal stripes through the yellow diamond cross your priority OUT: the priority king is dead, so the guy on your right rules again.
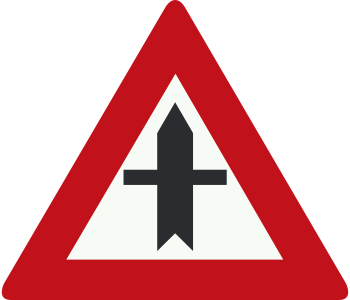
Priority crossroads: you approach a crossroads with side roads on both sides where you have right of way.
💡 The thick black road runs straight through the red triangle, the side roads left and right are thin: you are on the wide road and go first.
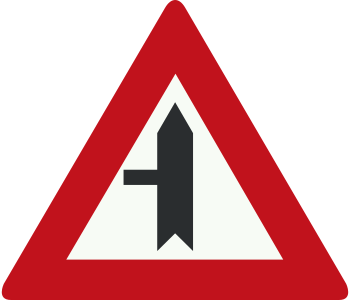
Priority intersection, side road to the left: junction with a side road on the left where you have priority over traffic from that side road.
💡 Thick road straight up the red triangle, a thin little side road on the left: that side road must wait for YOU.
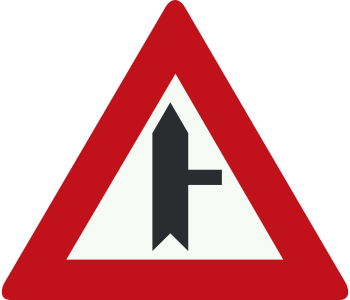
Priority intersection, side road to the right: junction with a side road on the right where you have priority over traffic from that side road.
💡 Thick road straight up the red triangle, a thin little side road on the right: even from the right, that traffic must wait for you.
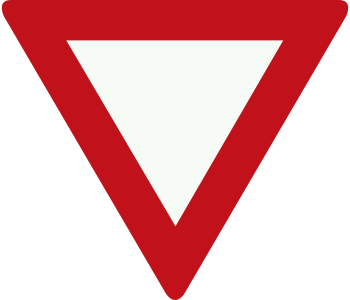
Give way to drivers on the intersecting road: inverted triangle; you must yield but only need to stop if there is crossing traffic.
💡 The upside-down triangle is a funnel pouring your right-of-way down to the other driver: let the crossing traffic go first.
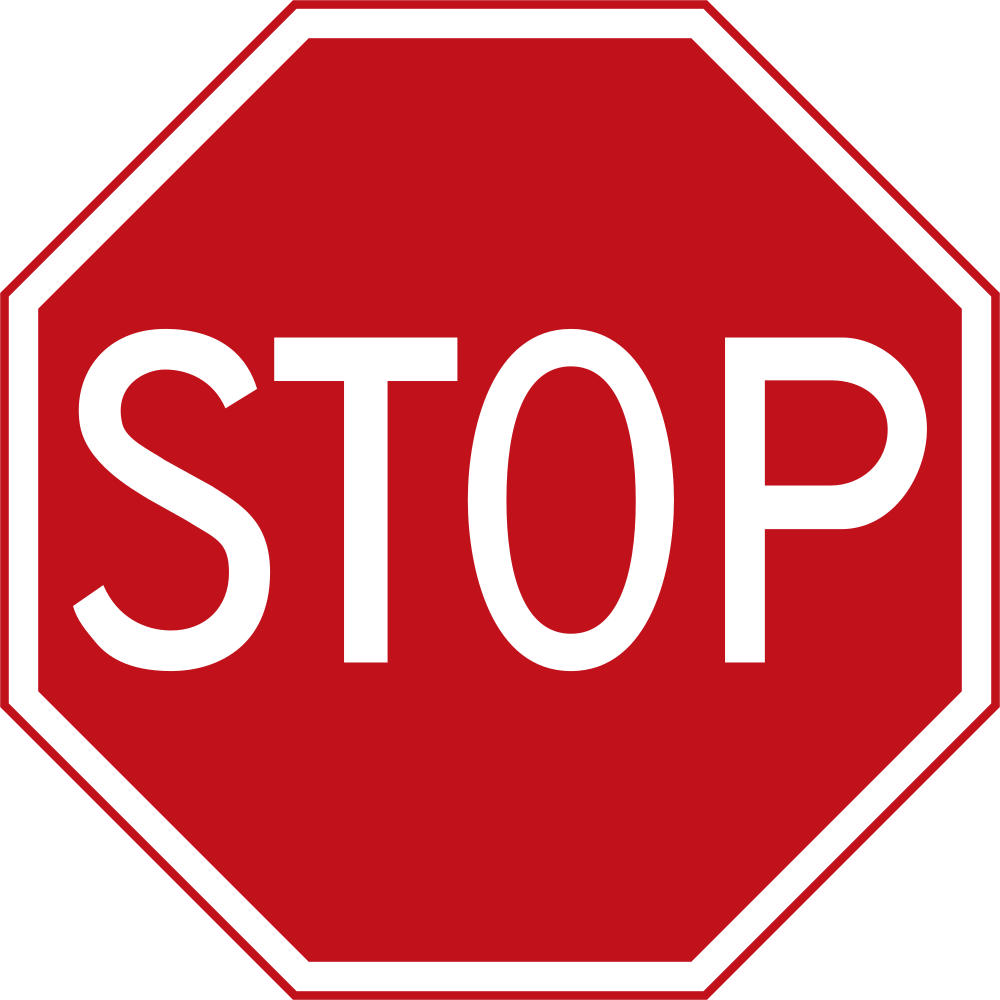
Stop; give way to drivers on the intersecting road: you must always come to a full stop before the stop line and then yield.
💡 The red octagon is a clenched fist yelling STOP, freeze fully at the line, and only crawl on when the crossing road is clear. Eight sides, zero excuses.
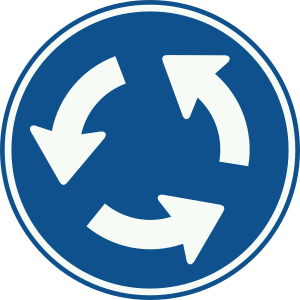
Roundabout; mandatory direction of travel (follow the arrows around the roundabout)
💡 A blue circle of arrows chasing their own tail: traffic spins like horses on a carousel - hop on and follow the loop, always the same way round.
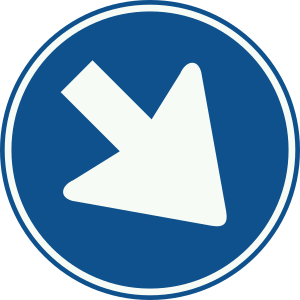
All drivers must pass the sign on the side indicated by the arrow (keep to that side)
💡 The round blue arrow is a bossy traffic cop pointing firmly: 'Pass on THIS side, no arguing!'
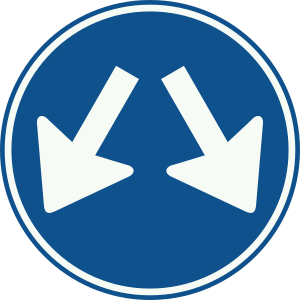
Sign may be passed on either side
💡 Two arrows split like a river flowing left AND right around the island: pick your side, both are fine.
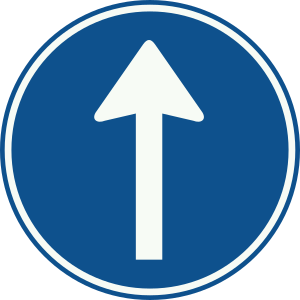
Mandatory to follow the single direction of travel shown on the sign (e.g. straight ahead or turn)
💡 The round blue sign with one arrow commands: 'Go where my finger points!' One arrow, no choice.
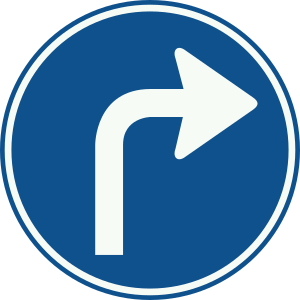
Mandatory to follow the single direction of travel shown on the sign (other direction)
💡 One blue arrow on a round button = one order: go THAT way, no arguing. Round-and-blue always bosses you into a direction.
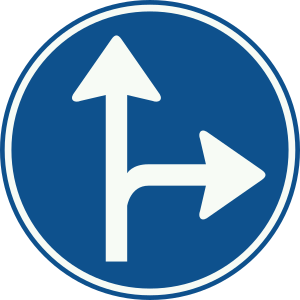
Mandatory to follow one of the directions of travel shown on the sign (double arrow)
💡 Two blue arrows split like a fork in the road: you must pick one prong, going straight is off the menu.
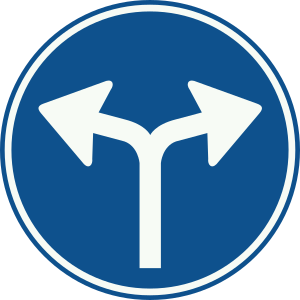
Mandatory to follow one of the directions of travel shown on the sign (double arrow, other combination)
💡 Two blue arrows, a fork: the menu has two dishes and there is no third.
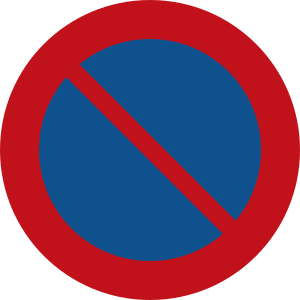
No parking (stopping to load/unload or let passengers in/out remains permitted)
💡 The blue disc with one red slash says: quick drop-off is fine, but don't park your car for a nap here. Parking no, brief stop yes.
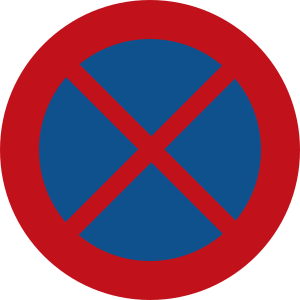
No stopping/standing (parking, loading/unloading and letting passengers in/out are all prohibited)
💡 The red ring slashed by a single cross shouts 'no standing still, ever': no parking, no loading, not even a heartbeat at the kerb.
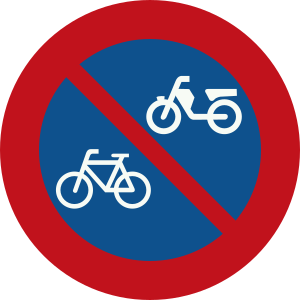
No placing of bicycles and mopeds (also applies to light mopeds and speed-pedelecs)
💡 The crossed-out bicycle cries: 'Don't PARK me here!' - no two-wheeler may be left standing in this spot.
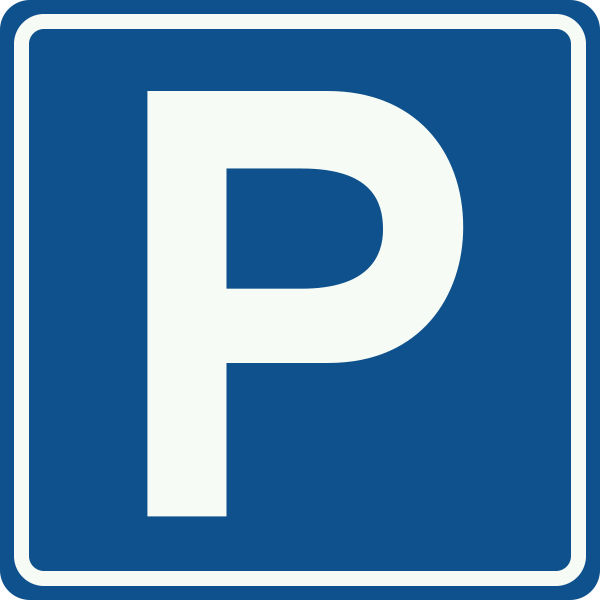
Parking facility / parking permitted
💡 The big white P on blue is the friendly Porter saying: 'Park here calmly, plenty of room.'
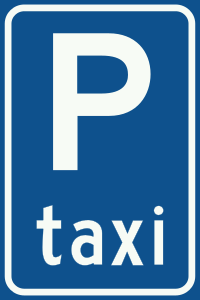
Taxi stand / taxi rank
💡 See the blue letter T? T is for Taxi, exactly where the cabs line up and wait.
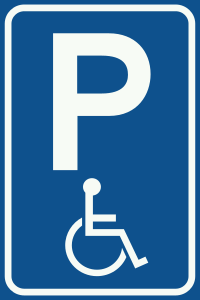
Disabled parking space (reserved for people with a disability)
💡 Blue square with a wheelchair: this bay is saved with respect for someone who truly needs it. No permit, no parking.
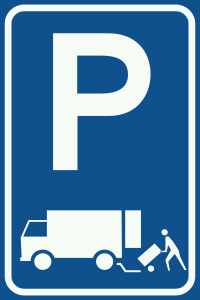
Space intended for the immediate loading and unloading of goods (parking is prohibited here)
💡 The blue P with a loading icon says: drop your cargo, grab it and go; linger to park and you're in the wrong.
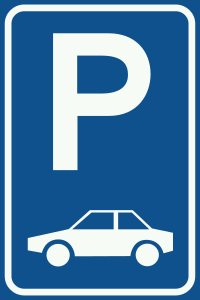
Parking facility reserved only for the vehicle category or group indicated on the sign
💡 The blue P shows just one kind of vehicle drawn on it: only that guest gets a spot here, everyone else drives on.
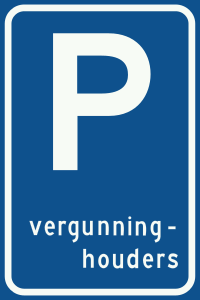
Parking facility reserved for permit holders only
💡 A blue parking sign with fine print underneath whispers: only those clutching a permit ticket may leave their car here. No permit, no spot.
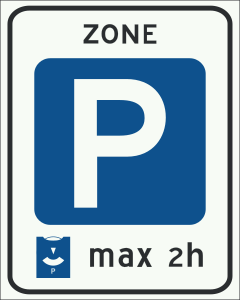
Parking disc zone: mandatory use of a parking disc at spaces marked with a blue line
💡 A blue sign showing a clock-disc: wherever a blue line hugs the kerb, spin your parking disc - blue stripe below, blue disc on the dash.
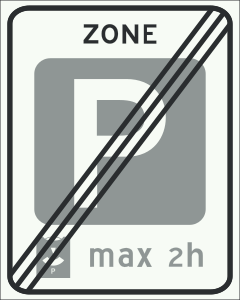
End of parking disc zone with mandatory use of a parking disc
💡 The crossed-out parking clock says: 'Put your disc back in the glovebox' - the disc zone is over.
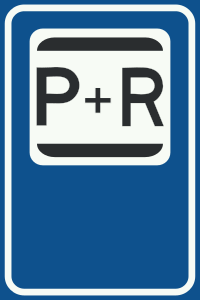
Parking facility for people transferring to public transport (Park and Ride)
💡 P+R = Park and Ride: leave the car here, the bus or train handles the rest.
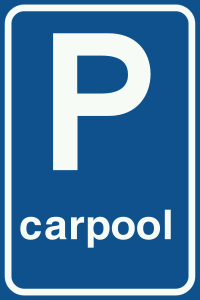
Parking facility for carpoolers
💡 Two hands shaking on blue: 'Share your car, share your spot' — the parking bay for carpoolers.
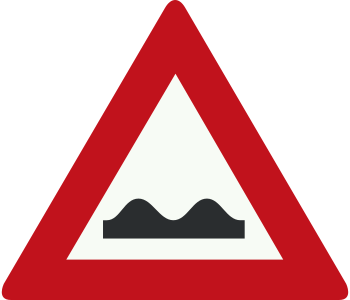
Warning for poor/uneven road surface
💡 Red triangle with a bumpy line: the road's about to hop like a rollercoaster, so grip that coffee tight.
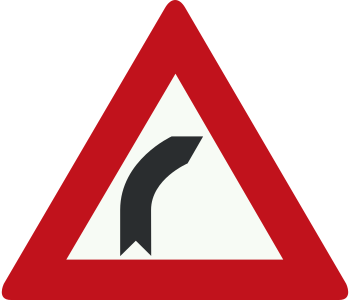
Warning for a bend to the right
💡 The red triangle bends with the road to the right: the line curls like a snake sliding off to that side.
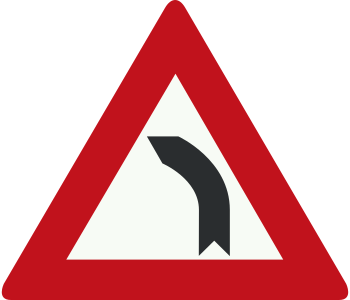
Warning for a bend to the left
💡 The black arrow bends off to the left like a river winding round the corner: get ready to steer left.
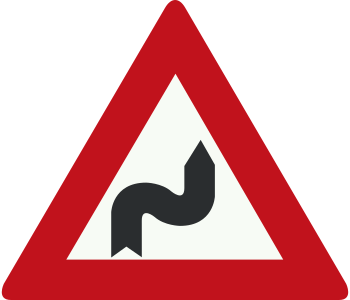
Warning for S-bends, first to the right
💡 The black ribbon wriggles like a snake poking its head right first: a double S-bend is coming, so lean into the right curve first.
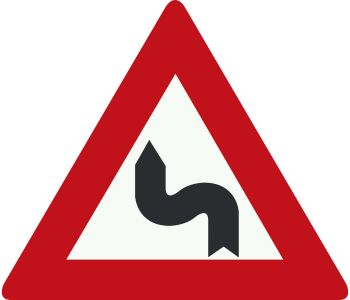
Warning for S-bends, first to the left
💡 The snake on the triangle wriggles left first: read the S as a 'Slithering Snake' - head swings left, then curls back right.
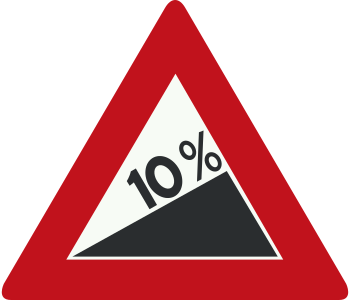
Warning for a steep hill (ascent)
💡 The triangle shows a little car climbing a mountain - brace yourself, the road rises STEEPLY up.
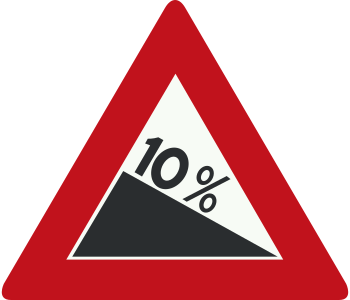
Warning for a dangerous (steep) descent
💡 The little car on the steep slope in the red triangle slides down: brakes ready, a dangerous descent is coming.
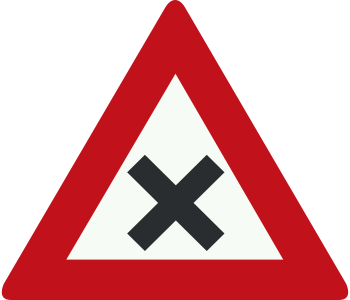
Warning for a dangerous intersection
💡 Two arrows collide head-on in the triangle: the junction ahead has a short fuse.
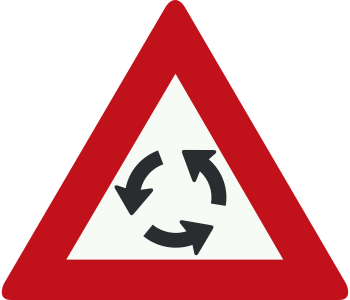
Warning for a roundabout
💡 Red triangle with three arrows chasing each other in a circle: soon you'll join the merry-go-round — the roundabout.
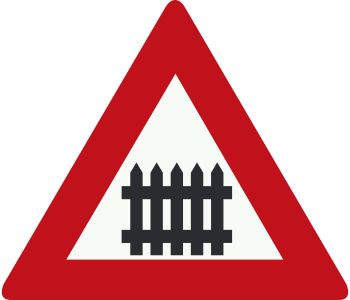
Warning for a railway level crossing with barriers
💡 The triangle with a fence means barriers are about to drop, stop or the bar taps your roof.
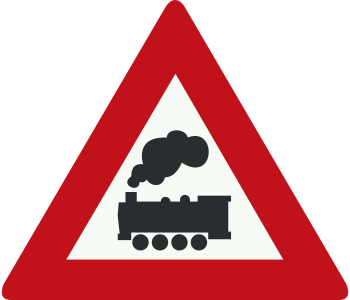
Warning for a railway level crossing without barriers
💡 A steam engine in the red triangle: ahead the railway crosses without barriers, so look for yourself before you cross.
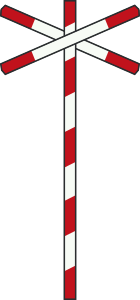
Level crossing with a single track
💡 One red-and-white St Andrew's cross: there is one track here - stop when a train approaches.
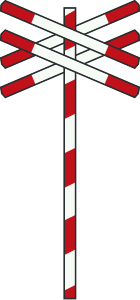
Level crossing with two or more tracks
💡 A double St Andrew's cross: two or more tracks - once one train has passed, a second may come right away.
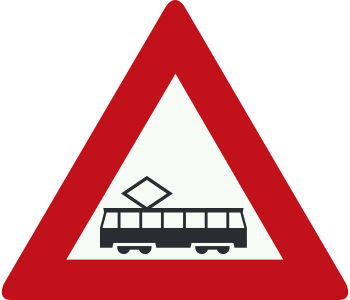
Warning for a tram or tram crossing
💡 A little tram sits in the triangle: watch out, a clanging tram is about to cross your path ahead.
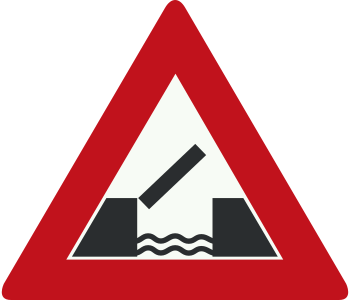
Warning for a movable (opening) bridge
💡 The split bridge in the red triangle lifts like double doors swinging up: watch out, a movable bridge ahead.
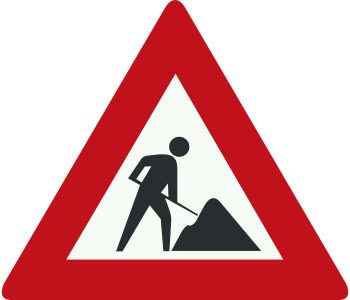
Warning for road works ahead
💡 Red triangle with a man digging: the worker is shovelling ahead — road works coming up.
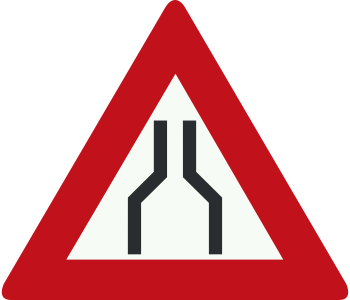
Warning for a narrowing of the carriageway (both sides)
💡 Triangle where the road pinches in from both sides: the lane is putting on a corset, so breathe in and hold the middle.
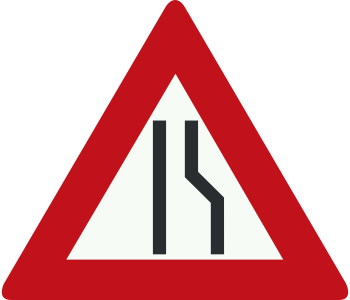
Warning for a narrowing of the carriageway on the right
💡 The triangle where the right edge pinches in: the road squeezes on that side, like a bottleneck narrowing to the right.
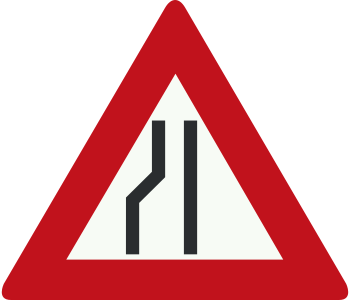
Warning for a narrowing of the carriageway on the left
💡 The road pinches shut on the left like a squeezed toothpaste tube: hug right, the left is closing in.
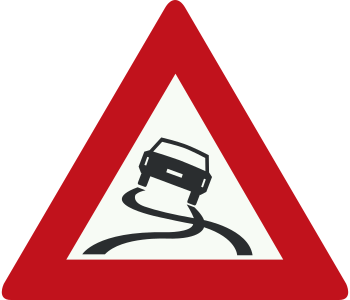
Warning for slippery road (skid hazard)
💡 The car on the triangle leaving two black skid squiggles is dancing on a slippery floor: beware, here your tyres can slide away.
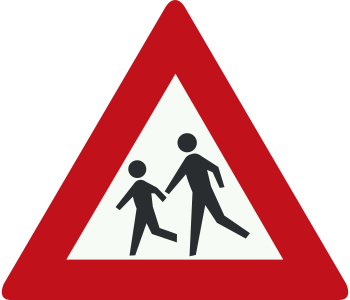
Warning for children (crossing/playing)
💡 Two running children on the triangle: picture a brother and sister bolting after a ball into the road - brake, because kids never look.
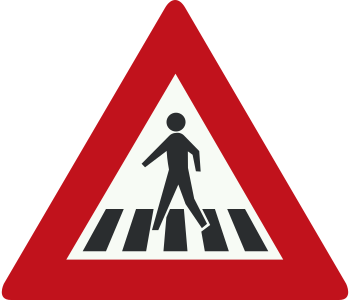
Warning for a pedestrian crossing
💡 A little walking figure on the zebra inside the triangle: ease off, someone crosses just ahead.
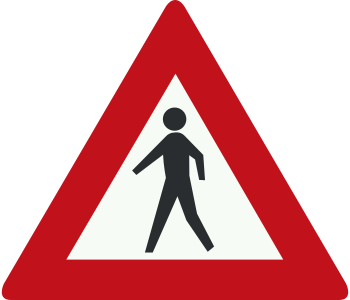
Warning for pedestrians
💡 Two black walkers stride through the red triangle: watch out, pedestrians are crossing ahead.
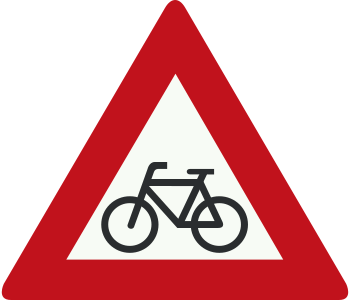
Warning for cyclists and moped riders crossing
💡 Red triangle with a bicycle: expect a cyclist or moped rider suddenly crossing your path.
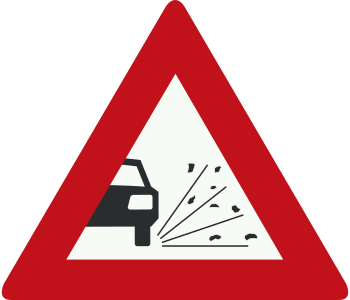
Warning for loose stones/gravel
💡 Triangle with little stones flying up: the road is popping popcorn — back off or your paint takes the chips.
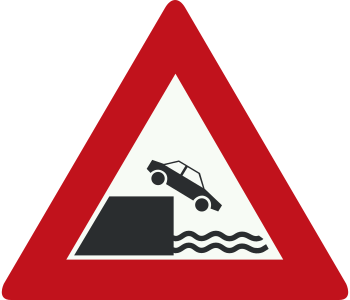
Warning for a quay or riverbank
💡 The triangle showing a car plunging into water: a quay or riverbank is close, brake or you make a splash.
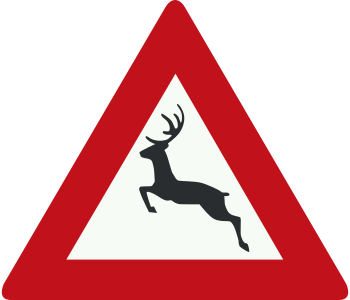
Warning for wild (large) game crossing
💡 A leaping deer in the red triangle: any second Bambi could bolt across the road, so ease off the gas.
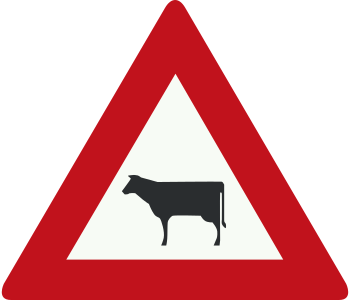
Warning for livestock crossing
💡 A fat cow standing calmly on the red triangle is chewing right in your lane: brake, because livestock may amble across.
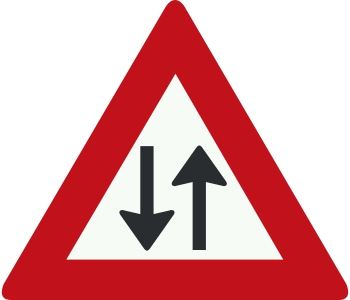
Warning for oncoming traffic
💡 Two arrows pointing head-on at each other: nose to nose, a car is coming straight at you - the arrows nearly collide, so mind oncoming traffic.
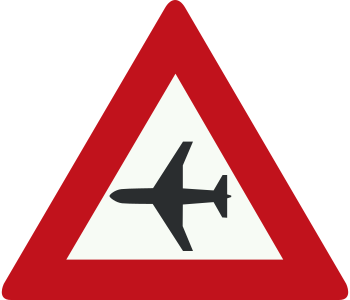
Warning for low-flying aircraft
💡 A little plane skims low over the triangle: don't be startled when an aircraft passes right above you.
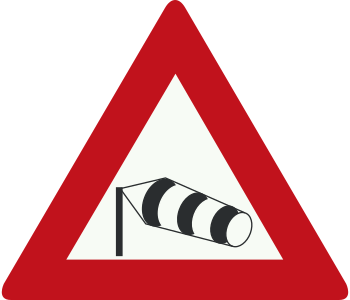
Warning for crosswind (side wind)
💡 The tree bending like a flag inside the red triangle: grip the wheel, crosswind will shove your car here.
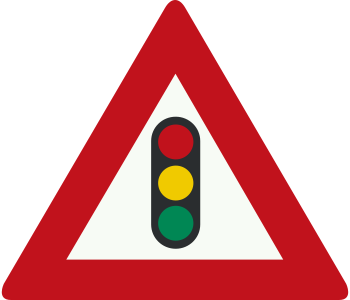
Warning for traffic lights ahead
💡 Red triangle with three dots like a traffic light: red-amber-green waits around the bend, lights ahead.
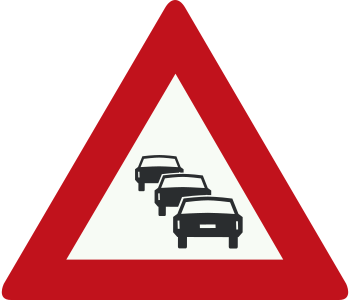
Warning for traffic jam / queues
💡 Triangle with cars nose-to-tail: a traffic jam lined up like train carriages — ease off the gas and pack your patience.
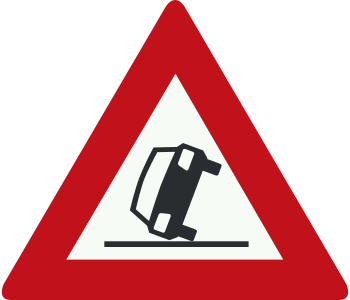
Warning for an accident ahead
💡 Two cars have kissed inside the triangle: an accident ahead, ease off the throttle.
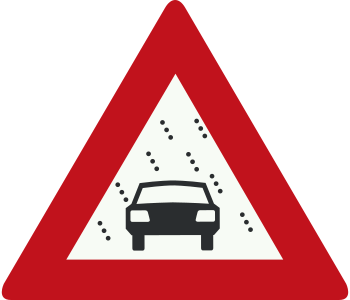
Warning for poor visibility due to snow, rain or fog
💡 Slanted lines like falling rain and snow across the triangle: your view vanishes here, so switch your lights on.
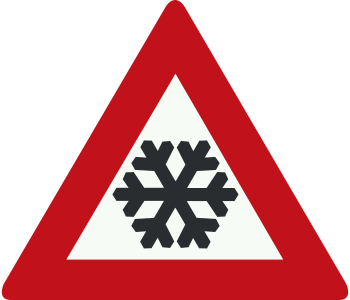
Warning for ice or snow on the road
💡 A snowflake on the triangle gives you a cold shiver: black ice or snow lies ahead, so drive as if the road were made of glass.
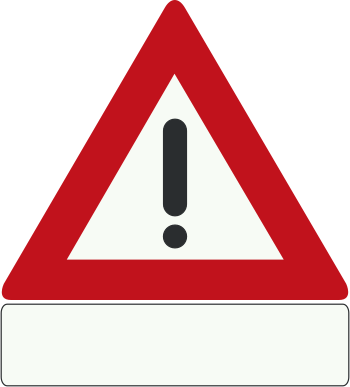
Warning for a danger, the nature indicated on a sub-plate
💡 A bare triangle holding just an exclamation mark: 'Danger ahead, but what kind is written below' - read the sub-plate for the punchline.
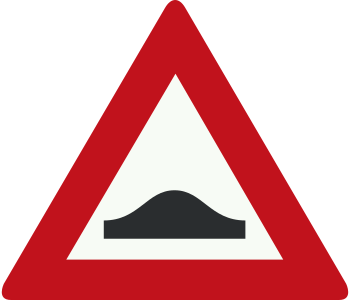
Warning for a speed bump / road hump
💡 The little bump in the triangle is a sleeping hump: ease off the gas or you'll thump right over it.
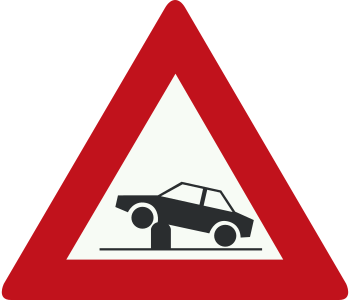
Warning for an electrically retractable bollard (poller) in the carriageway
💡 The fat post shooting up from the road in the red triangle: don't drive over it or it spears your floor — bollard in the carriageway.
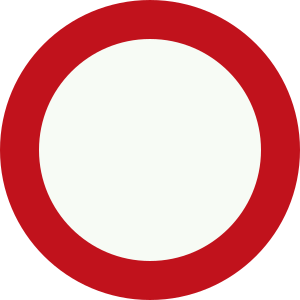
Closed in both directions for vehicles, riders and drivers of riding/draught animals or cattle
💡 An empty white disc with a red rim: nothing inside, so no one gets in - closed in both directions.
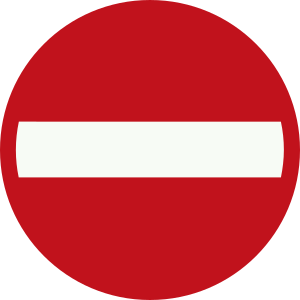
One-way street, closed in this direction (no entry) for vehicles, riders and drivers of animals or cattle
💡 Round red disc with a white horizontal bar: the bar blocks the way — 'do NOT enter'. You're at the wrong end of a one-way street.
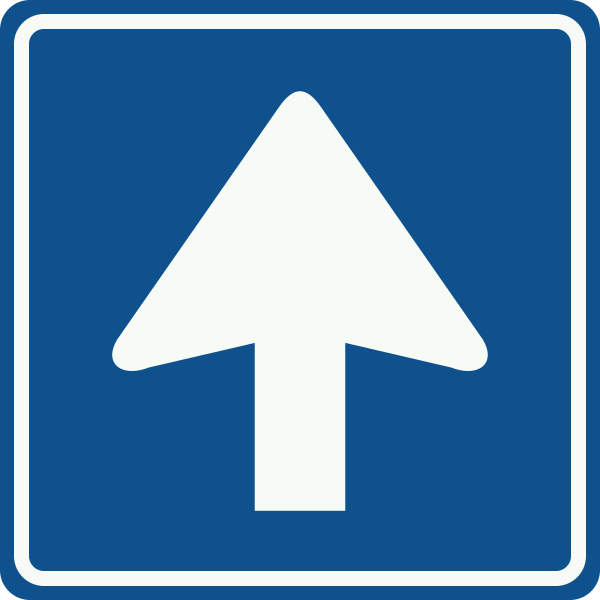
One-way street (traffic only permitted in the direction of the arrow)
💡 The blue rectangle with one white arrow is a one-way sign: it points a single direction, so that is the only way you flow.
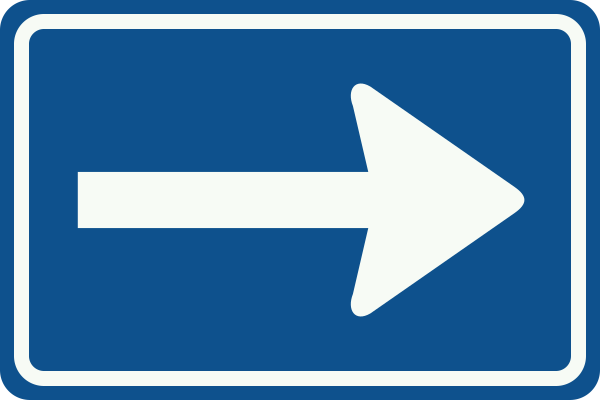
One-way street (arrow variant placed at driveways or side roads)
💡 A crisp white arrow on blue points one way: this is a one-way street, you only go that direction.
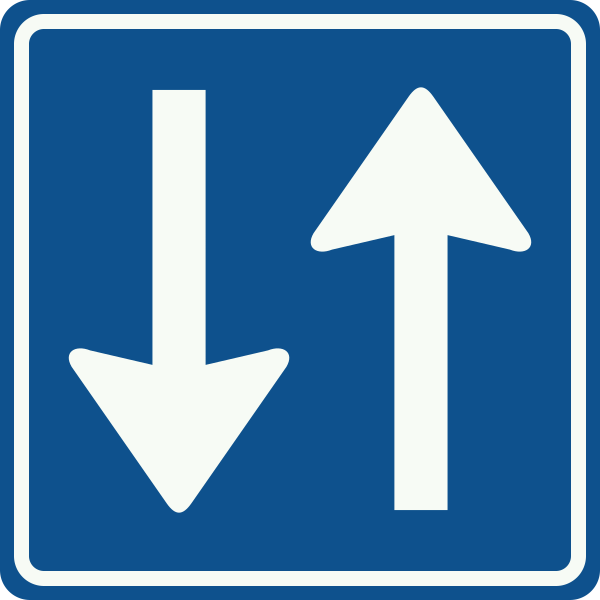
Entry permitted
💡 A blue sign with a white arrow pointing straight ahead says warmly: come on in, this road is open for you.
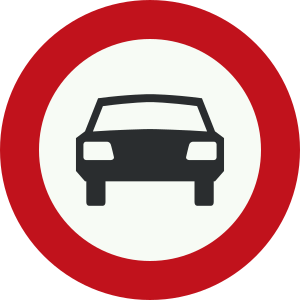
Closed for motor vehicles with more than two wheels
💡 Red circle with a car inside: anything on more than two wheels stays out - a motorcycle on two wheels still slips past.
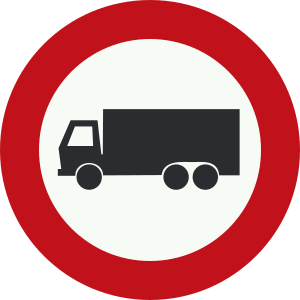
Closed for trucks (lorries)
💡 A fat red ring around a truck: 'Lorries, halt here!' - no truck may enter this road.
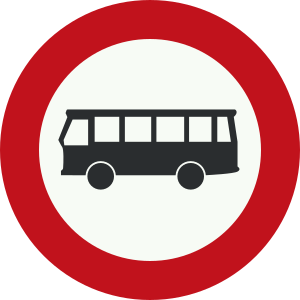
Closed for buses
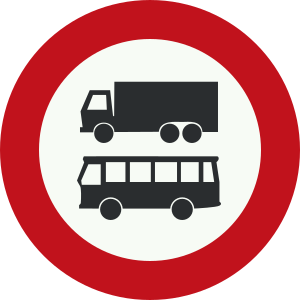
Closed for buses and trucks
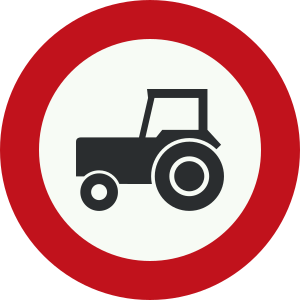
Closed for motor vehicles unable or not permitted to travel faster than 25 km/h
💡 The red ring around the slow tractor: anything that can't top 25 stays outside this fence.
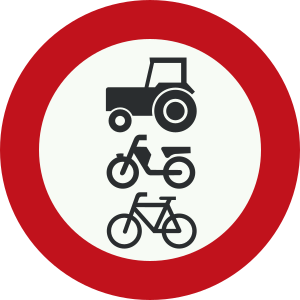
Closed to riders, livestock, carts, agricultural and forestry tractors, motor vehicles with limited speed, mobile machinery, micro-cars (brommobielen), bicycles, light mopeds, mopeds and disability vehicles
💡 Red ring with a horse and cart: the slow crowd — riders, cattle and creeping carts — stays out here.
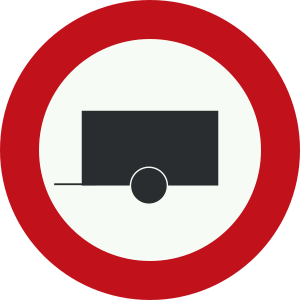
Closed for motor vehicles with a trailer
💡 Red ring around a car towing a trailer: 'leave the little wagon at home' — no entry while you're pulling one.
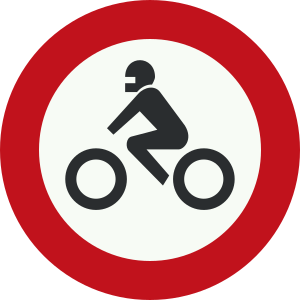
Closed for motorcycles
💡 The red circle with a motorcycle inside: no motorcycle may enter here, the roaring two wheels stay out.
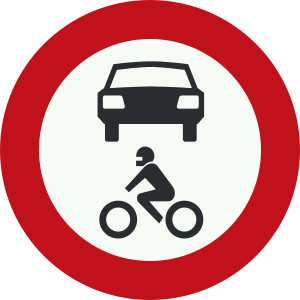
Closed for all motor vehicles
💡 A car and a motorcycle together in the red ring: everything with an engine stays out - no motor vehicle at all may enter.
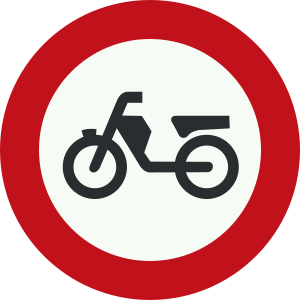
Closed for mopeds, light mopeds (snorfietsen) and disabled-person vehicles with the engine running
💡 The red ring with a little moped inside says: engine running? Then mopeds, light mopeds and disabled-person vehicles stay out.
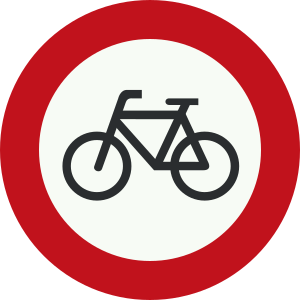
Closed for bicycles and for non-motorised disabled-person vehicles
💡 Red ring around a bicycle: pedals are banished here, and so is the hand-powered disabled cart - no wheels-by-muscle allowed.
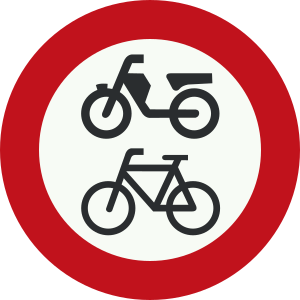
Closed for bicycles, mopeds and disabled-person vehicles
💡 Red ring around a bicycle: two-wheelers must brake - no bike or moped is allowed in.
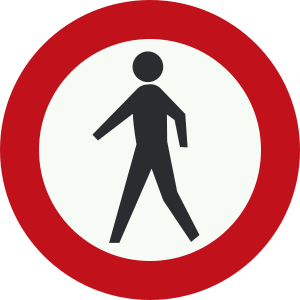
Closed for pedestrians
💡 The red ring cages the walker: no entry on foot, pedestrians must stay out.
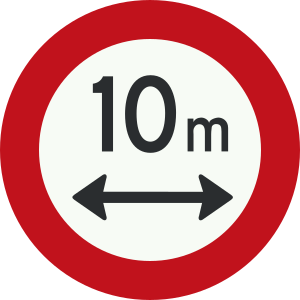
Closed for vehicles and combinations longer than indicated (load included)
💡 Red ring with a number and a long vehicle: too long is a no — if you exceed the length, you don't fit in.
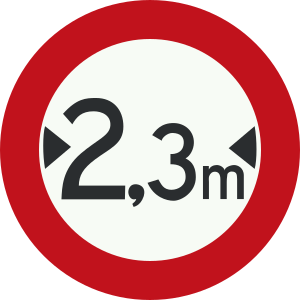
Closed for vehicles wider than indicated (load included)
💡 Red ring with two arrows pointing at each other: the road is measuring your waistline — too wide and you simply won't fit.
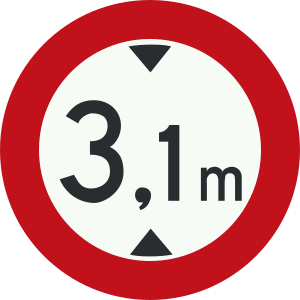
Closed for vehicles higher than indicated (load included)
💡 The red circle with two arrows pointing inward like a low doorframe: too tall and you bump your head, this gate stops high roofs.
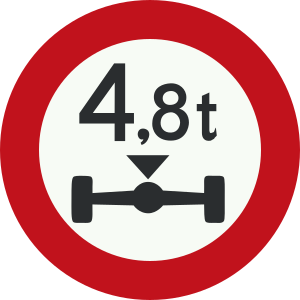
Closed for vehicles whose axle load exceeds the indicated value
💡 The number in the red ring shows how much each axle may press: heavier axle load, and you stay out.
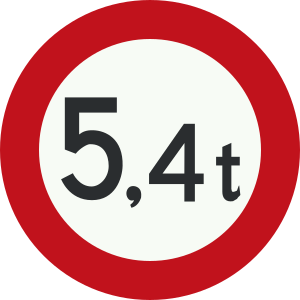
Closed for vehicles/combinations whose total mass exceeds the indicated value
💡 A red ring with a fat number in tonnes: if your truck-plus-trailer weighs more than that figure, the road slams shut for you.
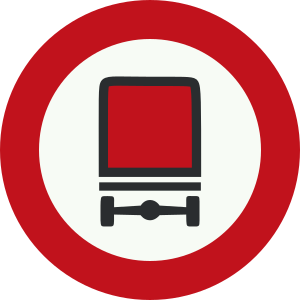
Closed for vehicles carrying certain dangerous goods
💡 Red circle over a truck marked with hazard cargo: the danger-goods lorry is turned away - explosive or toxic loads stay out.
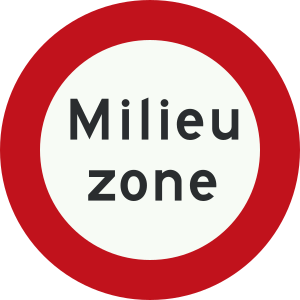
Environmental zone: closed for vehicles that do not meet the environmental requirements of the zone.
💡 The green word 'milieuzone' in a red ring: only clean-air vehicles may enter, dirty exhausts stay out.
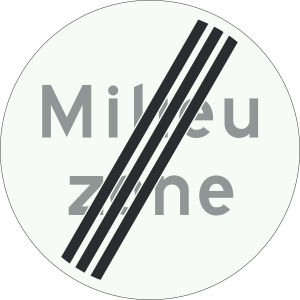
End of environmental zone / end of the closure indicated by sign C22a.
💡 The grey crossed-out environment shield: the clean zone is over, from here the dirty engine may enter again.
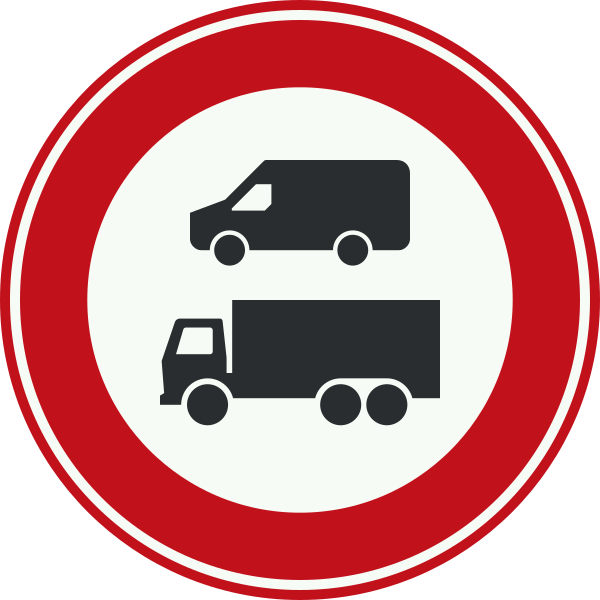
Zero-emission zone: since 1 January 2025 closed to vans and lorries that are not emission-free.
💡 A red ring round a van: from 2025 only what emits nothing gets in here.
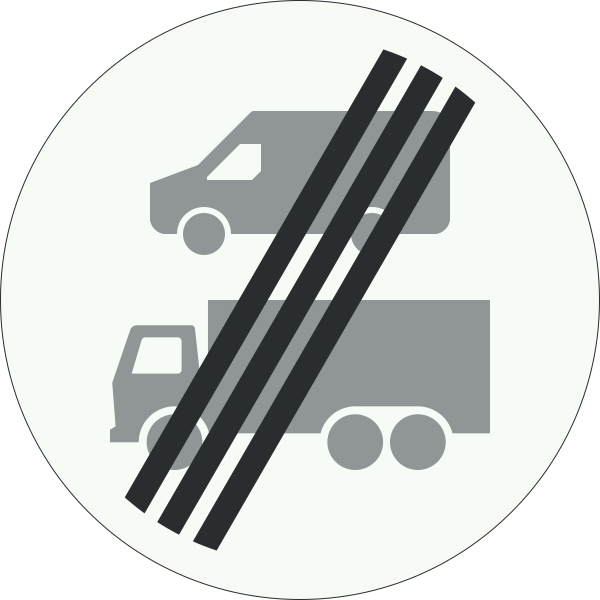
End of the zero-emission zone: the restriction of sign C22c no longer applies.
💡 The grey crossed-out sign: the clean-air doorman lets you go again.
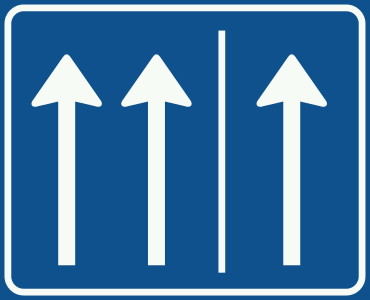
Rush-hour lane open (extra lane opened for use)
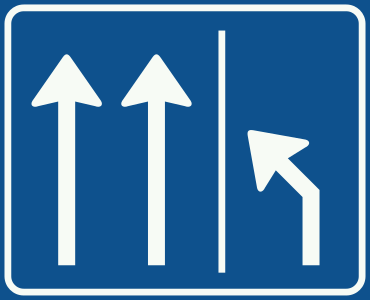
Clear the rush-hour lane
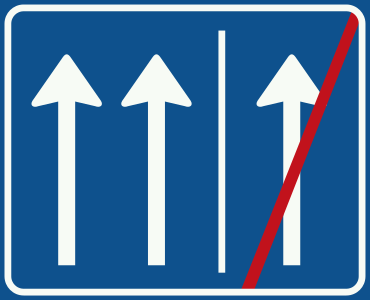
End of rush-hour lane
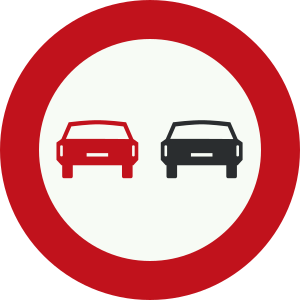
No overtaking of one another by motor vehicles
💡 Two cars side by side, one crossed out in red: 'stay in single file, no racing past each other.' No overtaking.
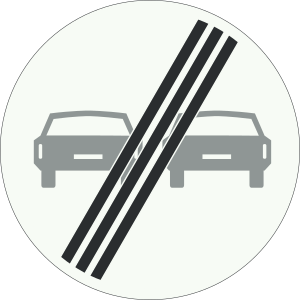
End of the no-overtaking prohibition for motor vehicles
💡 The two cars with a slash through the ban: the no-overtaking rule is over, the brake on passing lifts and you may pass again.
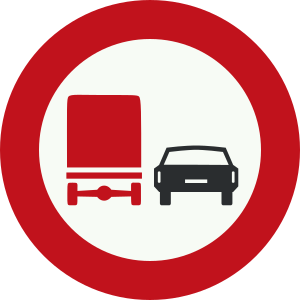
No overtaking of motor vehicles by trucks (lorries)
💡 A red truck behind a normal car with a bar between them: the big lorry may not slip past anyone.
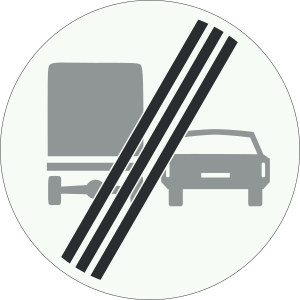
End of the no-overtaking prohibition for trucks
💡 The crossed-out 'trucks-may-not-overtake' sign: the slash shouts 'free!', lorries may pull out and pass again.
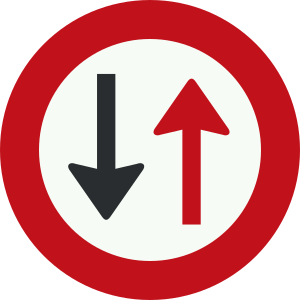
Drivers must give way to oncoming traffic (do not proceed when oncoming traffic approaches)
💡 The red arrow bows to the black one: 'red must brake and wait its turn' - oncoming traffic goes first, so you hold until they pass.
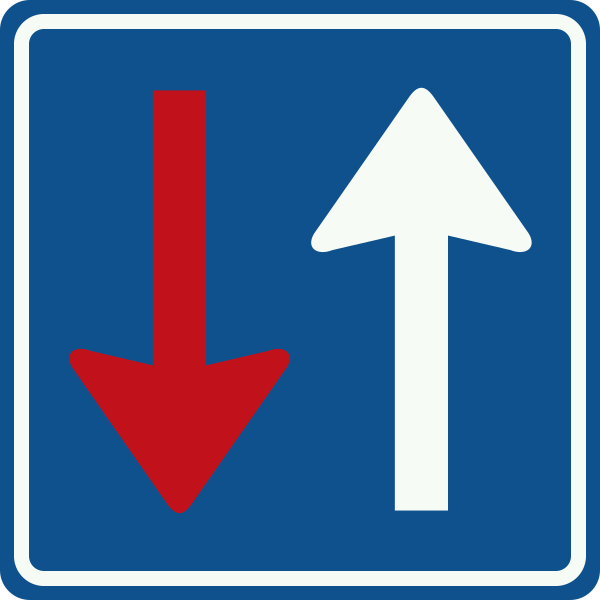
Priority over oncoming traffic; oncoming drivers must give way to you
💡 The big white arrow pushes the small red arrow aside: you may go, oncoming traffic waits politely.
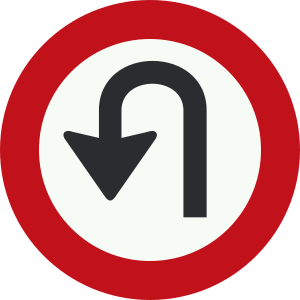
No U-turn (prohibition on turning around) up to the next junction
💡 A black U-arrow inside a red prohibition ring: no turning back, hold on until the next junction.
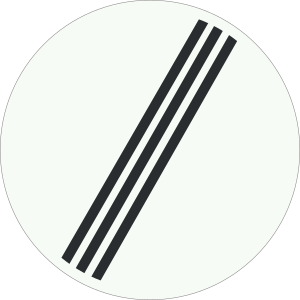
End of all prohibitions indicated by traffic signs
💡 Grey sign with everything struck through: one thick slash wipes away every ban — you're free again.
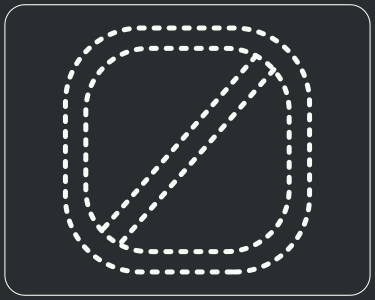
End of all prohibitions indicated on an electronic (matrix) signalling sign
💡 A diagonal stripe through the matrix sign: every prohibition the sign gave is lifted - you are free again.
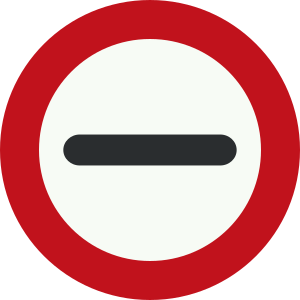
Stop; stop here when directed (e.g. customs, police or toll control)
💡 Red STOP at the barrier: someone here has a raised hand — customs or police. Stop and wait.
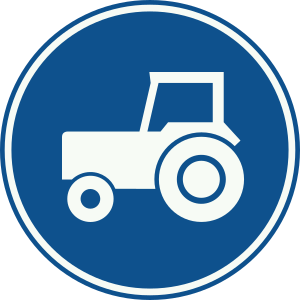
Compulsory use of the passing lane, reserved for agricultural/forestry tractors, slow motor vehicles (MMBS) and mobile machinery
💡 The blue arrow nudges the slow tractor onto its own lane: sluggish vehicles must use the passing strip.
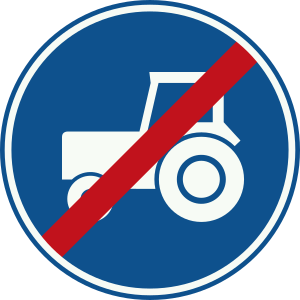
End of the compulsory passing lane for tractors, slow motor vehicles and mobile machinery
💡 End of the 'slow-tractors-must-use-the-passing-lane' order: the tractor may leave its special strip and rejoin the normal flow.
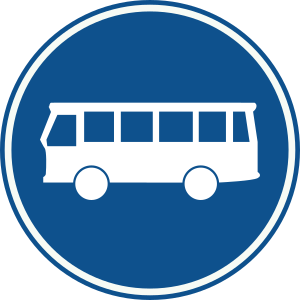
Carriageway or lane reserved exclusively for scheduled buses (bus lane)
💡 Blue sign spelling BUS: this lane is the scheduled bus's private red carpet - only the bus may roll here, everyone else keeps out.
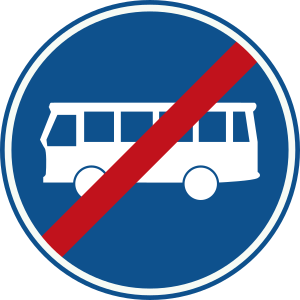
End of bus lane or carriageway
💡 The crossed-out 'BUS' waves goodbye: the bus lane ends here and everyone shares the road again.
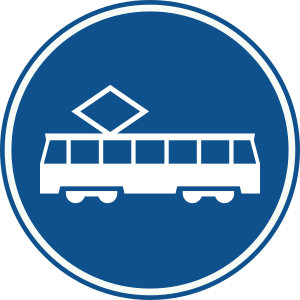
Carriageway or lane reserved exclusively for trams (tram lane)
💡 The lonely tram on blue owns its private lane: cars keep off, these rails are tram-only.
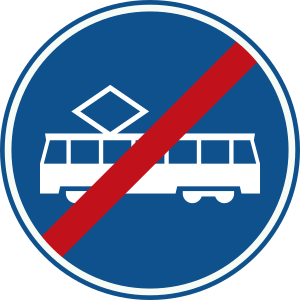
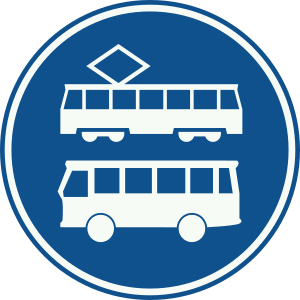
Carriageway or lane reserved exclusively for scheduled buses and trams
💡 A bus and a tram on one sign: this is their VIP lane — keep your car off it.
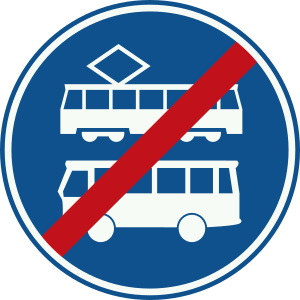
End of bus and tram lane or carriageway
💡 The VIP lane for bus and tram closes: both rejoin the ordinary crowd.
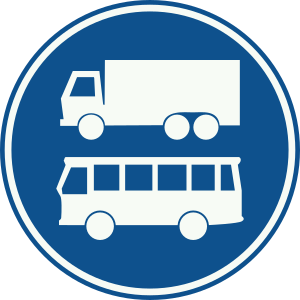
Carriageway or lane reserved exclusively for trucks and scheduled buses
💡 A blue lane drawn with only a truck and a bus on it: this strip is their private lane, cars keep out.
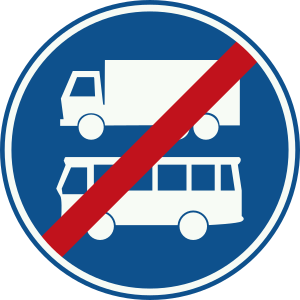
End of carriageway or lane for trucks and scheduled buses
💡 The heavyweights' private lane closes: lorry and bus merge back in with everyone else.
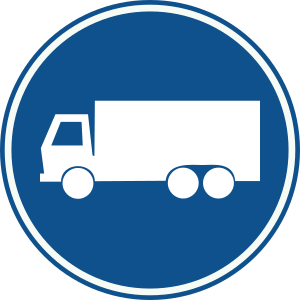
Carriageway or lane reserved exclusively for trucks (lorries)
💡 Blue sign with a truck: this lane is the big lorries' own private road - only trucks belong here, cars stay clear.
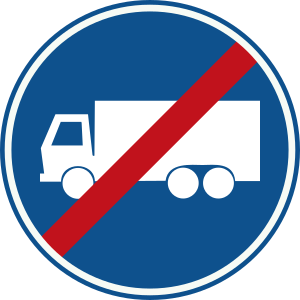
End of carriageway or lane for trucks
💡 The crossed-out truck lane: lorries, your private lane is over now, merge back in with the rest.
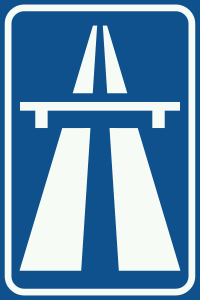
Motorway; only for motor vehicles able and permitted to drive faster than 60 km/h
💡 The blue sign with the flyover lines: welcome to the motorway, only fast motor vehicles over 60 allowed.
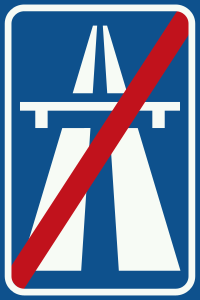
End of motorway
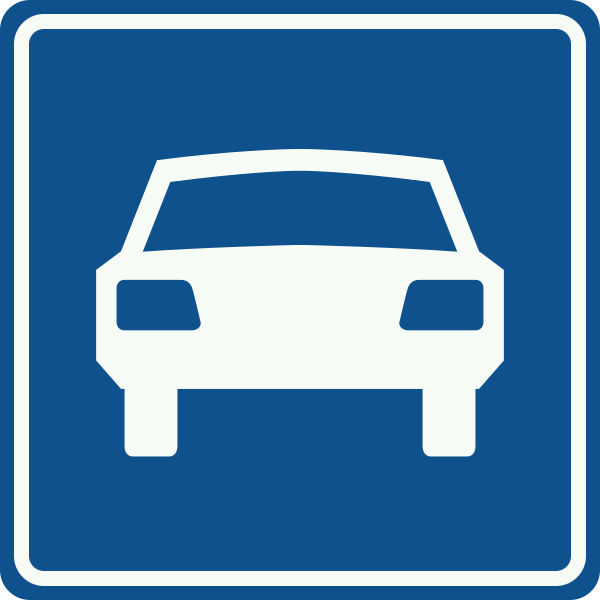
Expressway (clearway); only for motor vehicles able and permitted to drive faster than 50 km/h
💡 White car on blue: the expressway is the fast club — if you can't do over 50, you don't belong.
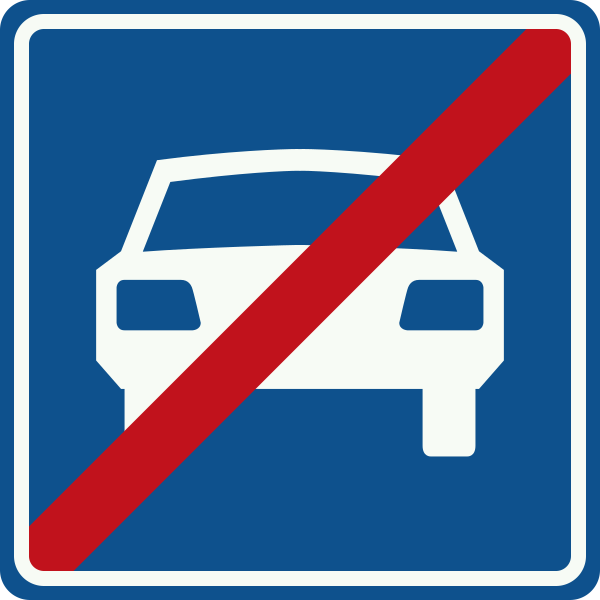
End of expressway
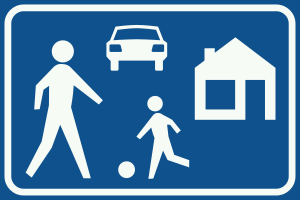
Residential zone (erf); maximum speed 15 km/h, pedestrians may use the whole road
💡 Little white house with a child playing on blue: welcome to the living zone — tiptoe through at 15 km/h max, the whole street belongs to everyone.
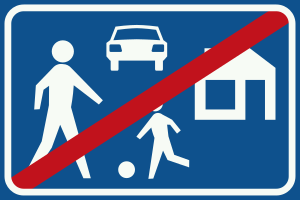
End of residential zone (erf)
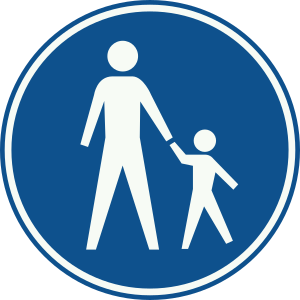
Footpath; reserved exclusively for pedestrians
💡 The blue sign with a walking figure: this little path is purely for feet, only pedestrians step here.
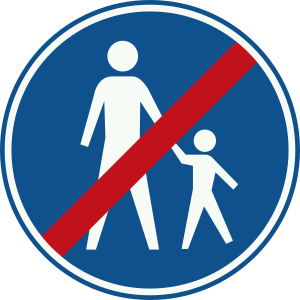
End of footpath
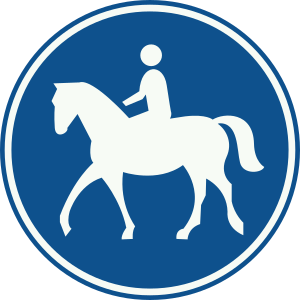
Bridleway; reserved exclusively for horses and riders
💡 A blue sign with a horse and rider: this path is a gallop track, only hooves may clatter here.
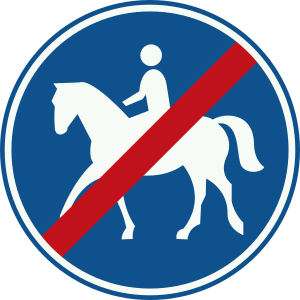
End of bridleway
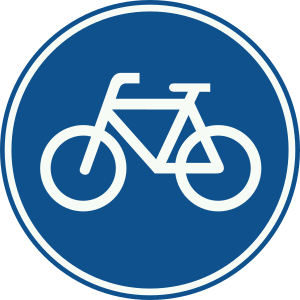
Compulsory cycle path; for cyclists and mopeds (snorfiets), who are obliged to use it
💡 Round and blue is an order, not an invitation: as a cyclist you belong here and nowhere else.
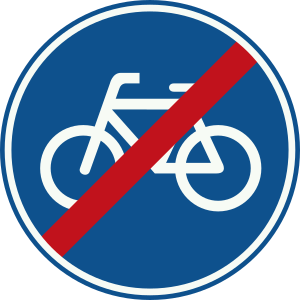
End of compulsory cycle path
💡 The order is crossed out: the blue circle is gone, you no longer have to stay on the cycle path.
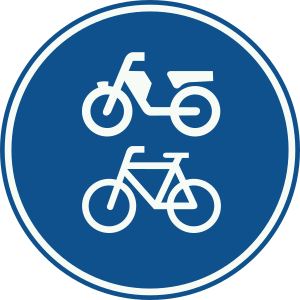
Compulsory cycle/moped path; for cyclists and mopeds (bromfiets/snorfiets)
💡 Bike and moped in one blue circle: two brothers sharing a bedroom — both have to sleep here.
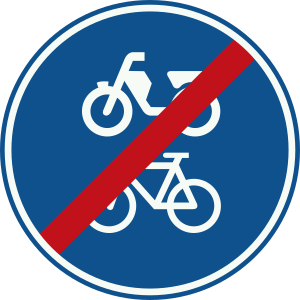
End of cycle/moped path
💡 Bike and moped together, but the circle is gone: the shared room is closed.
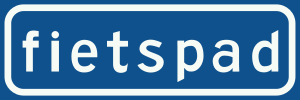
Non-compulsory cycle path; intended for cyclists and mopeds (snorfiets), but use is not obligatory
💡 No blue circle, just a white sign: an invitation, not an order. 'Come on in' — not 'you must'.
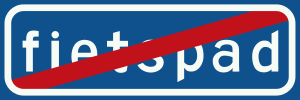
End of non-compulsory cycle path
💡 The invitation is crossed out: the optional cycle path ends here.
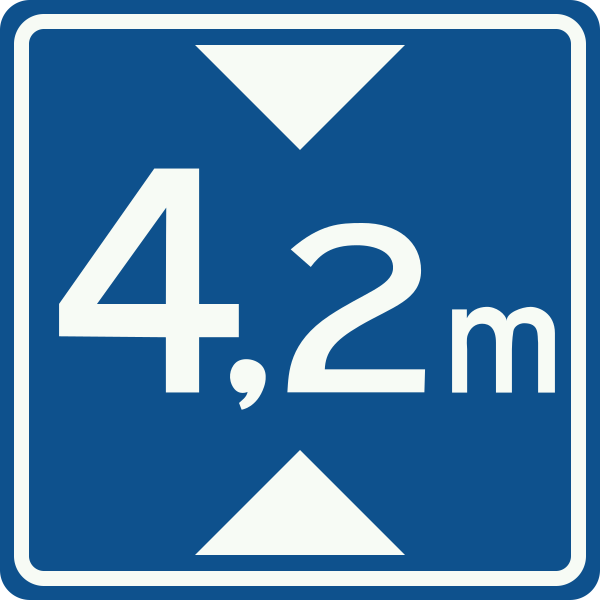
Clearance height of an underpass (indicates the available headroom)
💡 Two black arrows pointing at each other with a number between: that's the tunnel's ceiling — taller than the figure and you'll lose your hat.
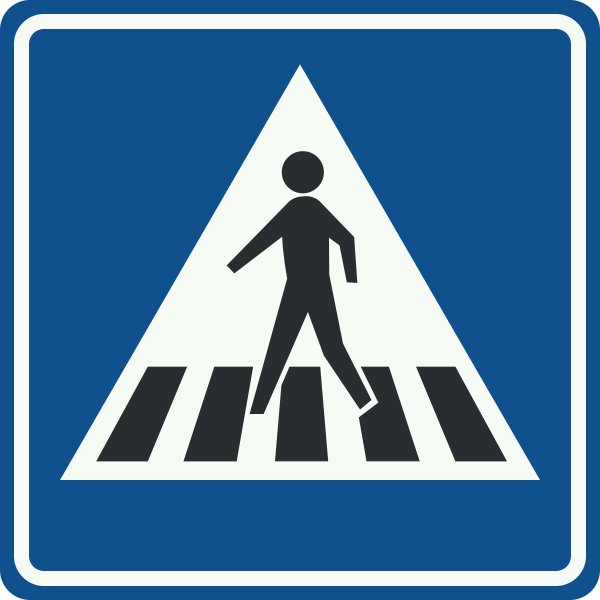
Pedestrian crossing (zebra crossing)
💡 The blue sign with a walker on stripes: here lies the zebra crossing, the white bars are your safe passage across.
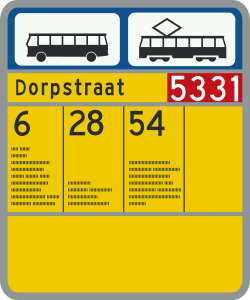
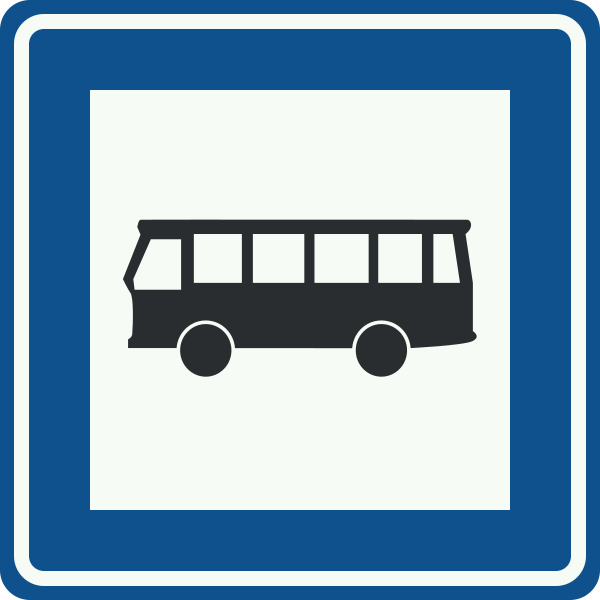
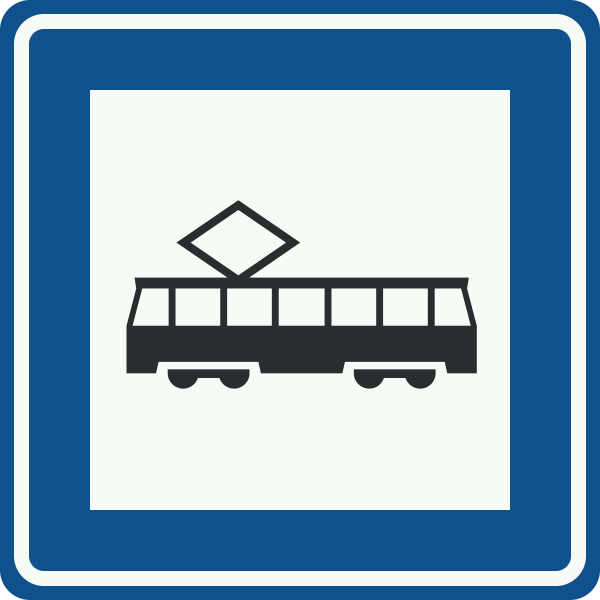
Bus stop / tram stop
💡 A blue plate with a bus (or tram): public transport pauses here, so this is the stop to hop aboard.
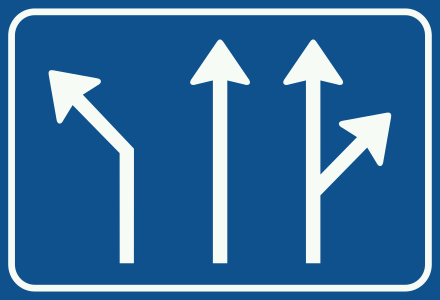
Get in lane / pre-sorting (indicates the lane for the shown direction)
💡 Arrows fanning apart say: choose your lane now, slot yourself into the strip pointing to where you want to go.
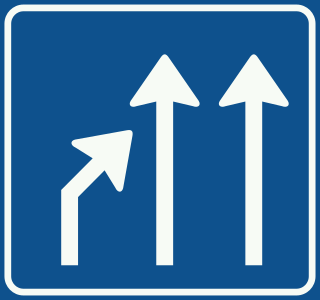
End of lane
💡 A blue sign of a lane pinching down to nothing: your strip of road is 'dying out' like a river running dry - merge across in good time.
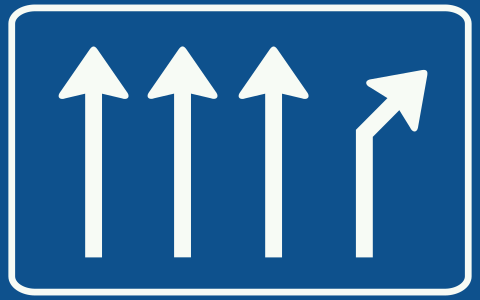
Splitting of the carriageway (road divides)
💡 The road splits like a forking branch: choose your side, left or right, as the way divides in two.
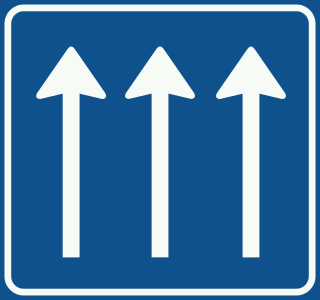
Number of through lanes
💡 The blue fan of arrows counts the straight-ahead lanes: this many lanes carry on without turning.
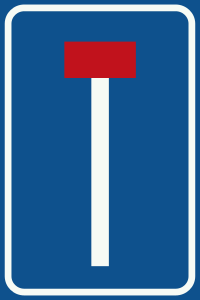
Dead-end road (no through road)
💡 A white post on blue with a red crossbar at the top: the road is a dead end, you can't get through.
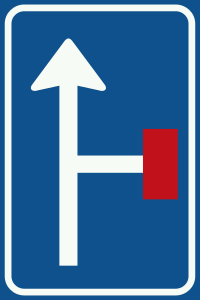
Advance warning of a dead-end road ahead
💡 Blue sign with a stub that dead-ends in red: this road stops — drive on and you'll park your nose against a wall.
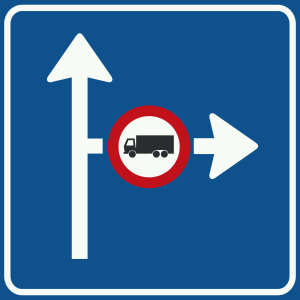
Advance notice of a traffic measure applying to the indicated direction(s)
💡 The sign with advance arrows: it warns you early about a traffic measure in the shown direction, a heads-up so nothing surprises you.
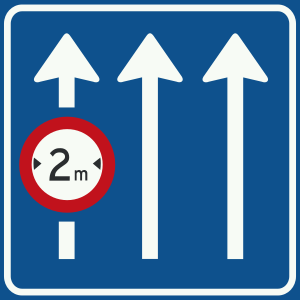
The traffic sign applies only to the indicated lane or lanes
💡 Arrows point straight down onto your lanes: the sign above speaks only to those marked lanes, no others.
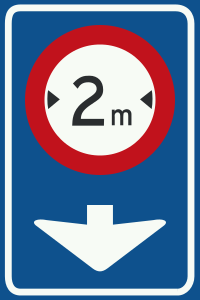
The traffic sign applies only to the indicated single lane
💡 A sign with an arrow aimed at just one lane: 'I count here only', whatever it says applies to that single strip alone.
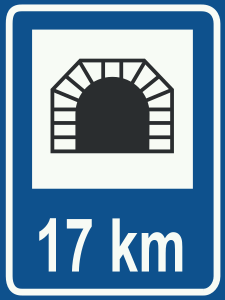
Road tunnel (with tunnel length indicated)
💡 Blue sign with a tunnel mouth and a number: the digits count the metres of darkness - the bigger the number, the longer you dive underground.
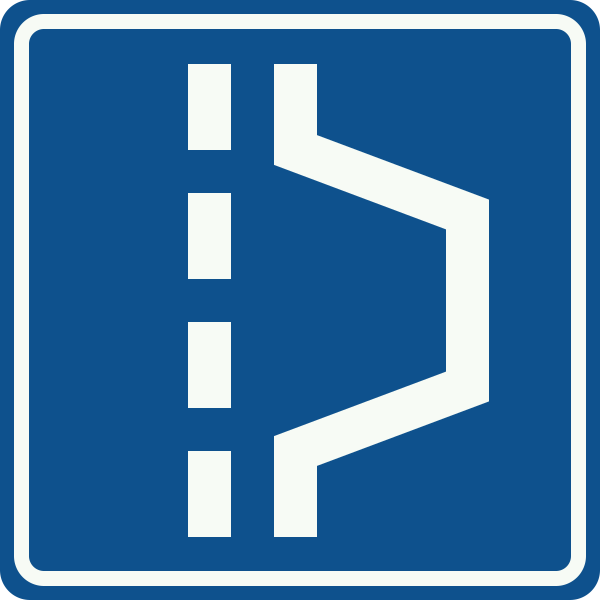
Emergency refuge / lay-by (safe stopping bay)
💡 A safe little harbour beside the motorway: if you break down, this is where you slip aside to safety.
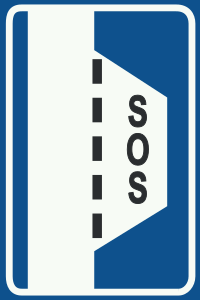
Emergency refuge equipped with an emergency telephone and a fire extinguisher
💡 A phone in a lay-by: the motorway's lifebuoy — broken down? shelter here and call from here.
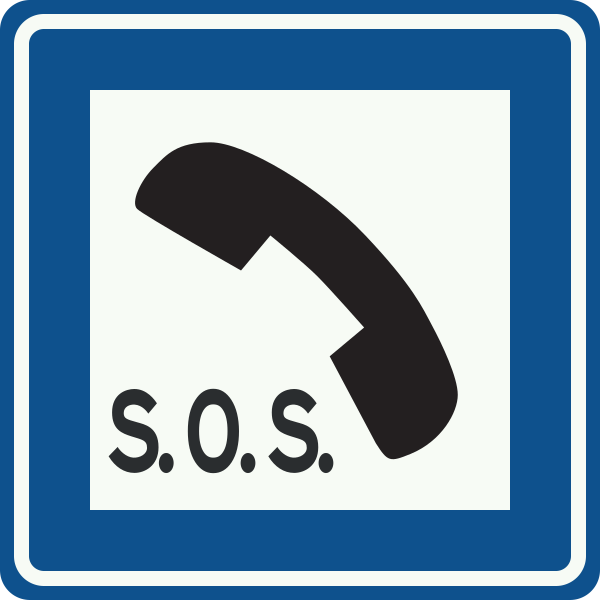
Emergency telephone
💡 Blue sign with a phone handset: in trouble, grab the handset — this is the roadside emergency phone.
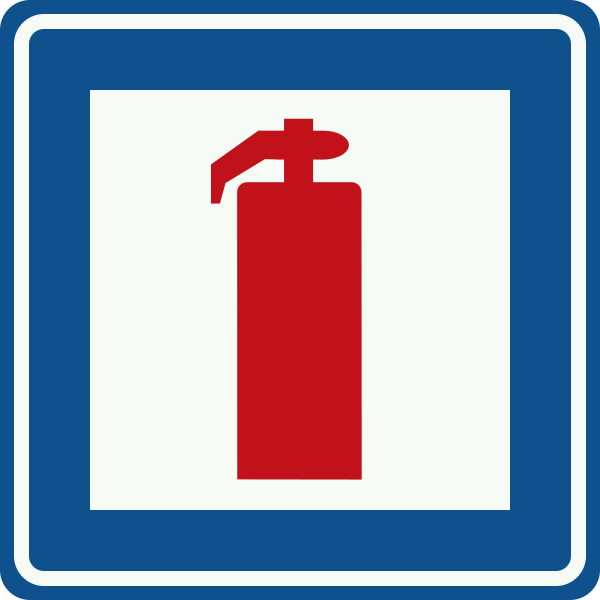
Fire extinguisher
💡 A little white flame on the sign: the fire extinguisher lives here — think 'flames? grab here!'
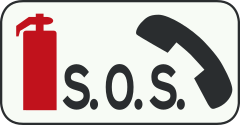
Emergency telephone and fire extinguisher
💡 The blue sign with a phone and extinguisher: trouble on the road, here you call for help and grab the fire extinguisher.
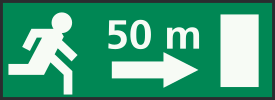
Indication of the nearest exit, or of the two nearest exits, with direction and distance (tunnel escape)
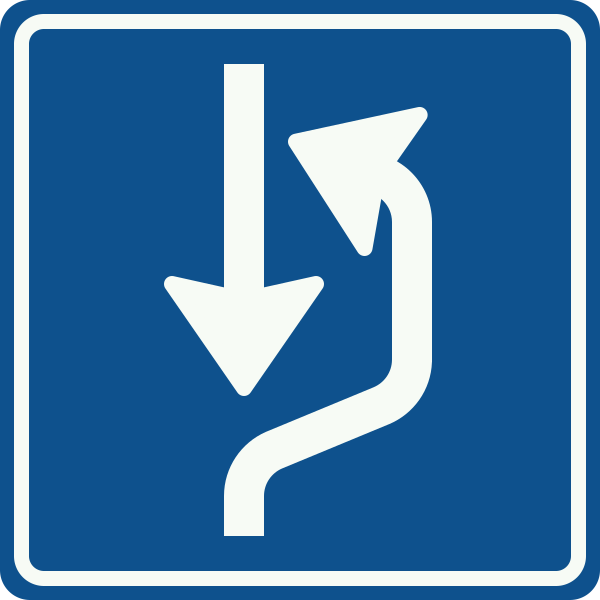
Passing / pull-over place on the right side of the road
💡 A blue sign with a bulge to the right: here's a safe little pocket to pull over on the right.
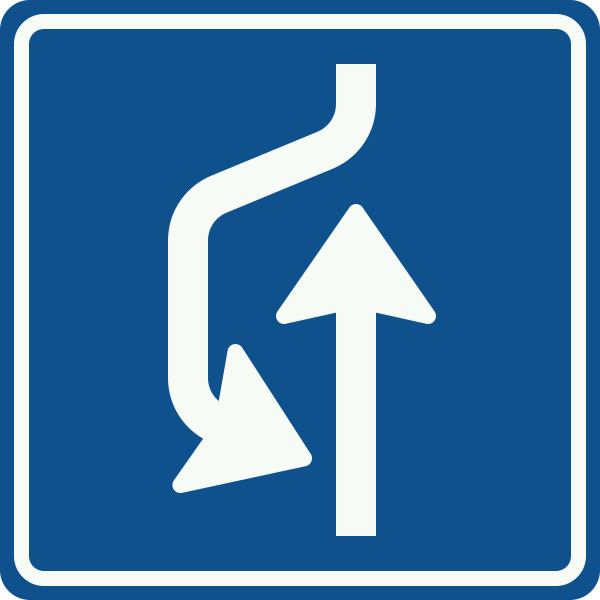
Passing / pull-over place on the left side of the road
💡 A little bulge on the left of the road is your escape harbour: pull over left here to let the oncoming car slip past.
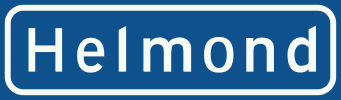
Built-up area (blue place-name sign; start of the built-up area / town)
💡 A blue sign carrying a place-name: blue means 'welcome to the town' - the built-up area starts right here, so ease off the pedal.
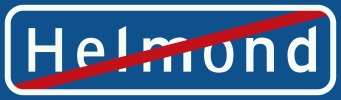
End of built-up area (place-name sign crossed out in red; end of the built-up area / town)
💡 The place name is crossed out: the town waves you off, your foot can leave the brake.
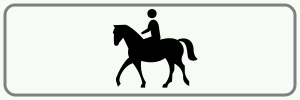
Supplementary panel 'rider': the sign above applies to horse riders.
💡 A horse underneath: this sign is talking to whoever is in the saddle.
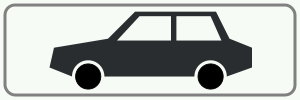
Supplementary panel 'car': the sign above applies to passenger cars.
💡 A car underneath: the sign says 'I mean you, not the lorry'.
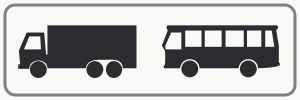
Supplementary panel 'lorry and bus': the sign above applies to lorries and buses.
💡 Lorry and bus underneath: this sign is read out to the heavyweights only.
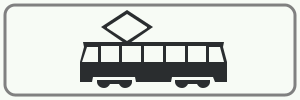
Supplementary panel 'tram': the sign above applies to the tram.
💡 Rails underneath: this sign is not for tyres but for steel wheels.
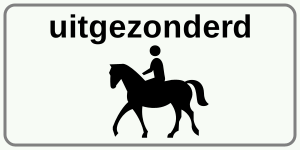
'Except' panel: the rule of the sign above does not apply to riders.
💡 Riders are on the guest list: the ban applies to everyone except them.
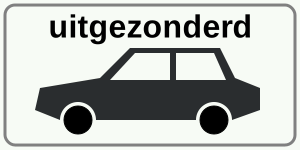
'Except' panel: the rule does not apply to passenger cars.
💡 Cars are on the list by name: the ban lets them through.
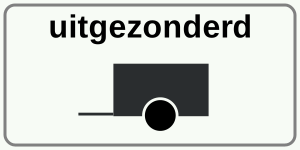
'Except' panel: the rule does not apply to a motor vehicle with trailer.
💡 Towing a trailer? You are in luck: the ban skips you.
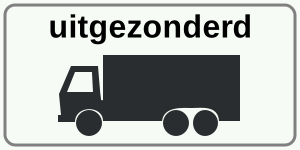
'Except' panel: the rule does not apply to lorries.
💡 Lorries are invited: the ban above does not bind them.
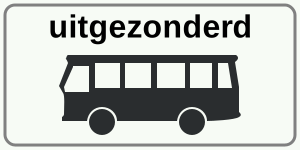
'Except' panel: the rule does not apply to buses.
💡 Buses are the exception: the ban salutes them and lets them pass.
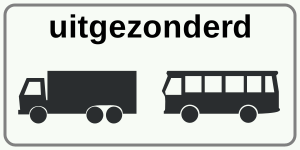
'Except' panel: the rule does not apply to lorries and buses.
💡 Lorry and bus exempt together: both are on the list.
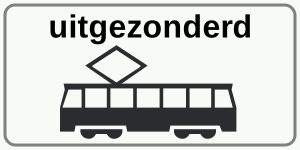
'Except' panel: the rule does not apply to the tram.
💡 The tram is exempt: steel on rails is not covered by the ban.
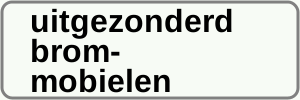
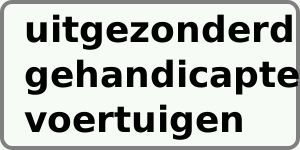
'Except' panel: the rule does not apply to vehicles for the disabled.
💡 The disabled vehicle is exempt: the door always opens for it.
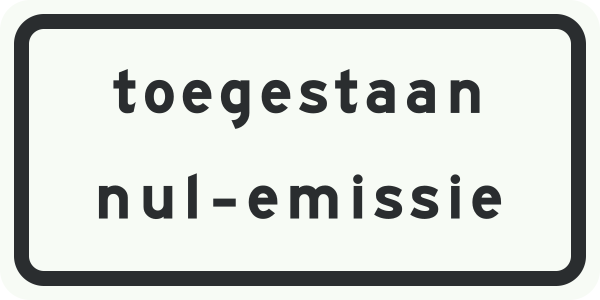
Sub-sign to sign C22c: the zero-emission zone is open to emission-free vans and lorries. Administrative sub-sign; rarely on the exam.
💡 Goes with the zero-emission-zone sign C22c: if you emit nothing, you may enter. Not needed for the exam.
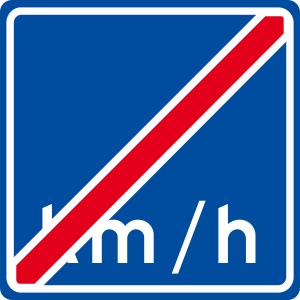
End of recommended (advisory) speed.
💡 The whispering stops: the little voice suggesting a speed goes quiet from here.
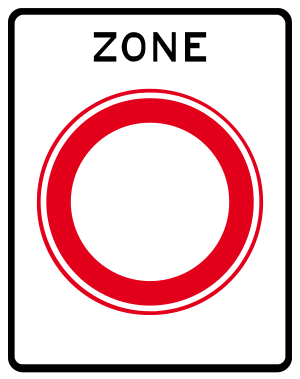
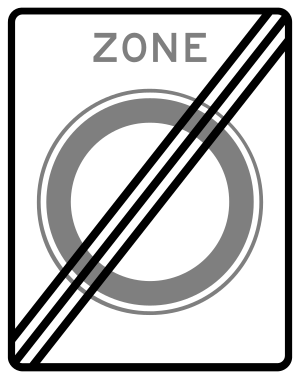
Maximum speed zone (start): the limit applies throughout the zone until the end sign.
💡 'Zone' works like a blanket: the sign covers not one spot but the whole neighbourhood.
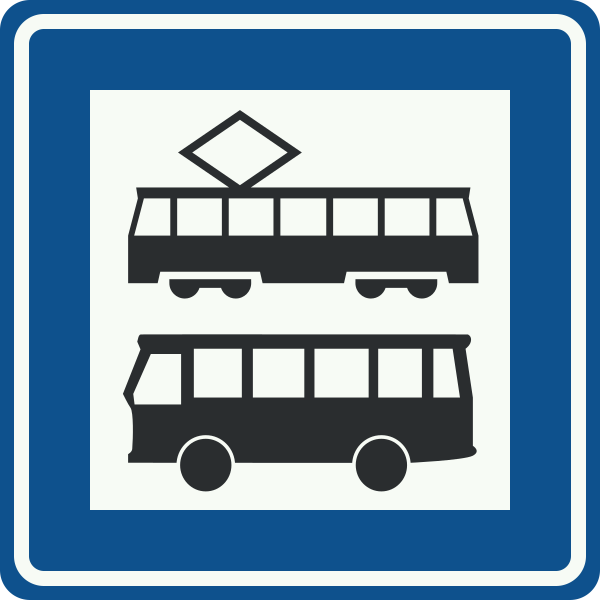
Tram stop and bus stop.
💡 Tram and bus shoulder to shoulder on one sign: two travelling companions sharing a stop.
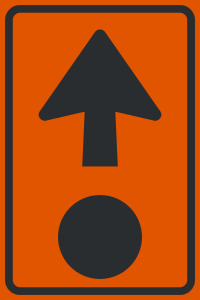
Route for the transport of hazardous materials.
💡 Mainly for freight transport; rarely on the car exam.
Rijtheorie Hub practises exactly like the CBR exam: 50 questions, 30 minutes, pass with 44. Free to try, in 12 languages.
Download free